






Quick answer: A wall-mounted grooming mat works best at cheek and shoulder height, in a place your cat already rubs. Let the cat choose contact, keep the surface clean and continue normal brushing and health checks.
Written by Petifo's Expert Team · Updated August 2026 · Reading time: 6 min
Explore this guide
- Follow the places your cat already marks
- Introduce scent and texture gradually
- Treat it as enrichment, not complete grooming
- Clean collected fur and check the mounting
- Recommended Petifo products
- Frequently asked questions
Choose your next step
1 · Assess
Check your pet’s measurements, habits and current routine before changing equipment.
2 · Compare
Use the guide’s checkpoints to compare only the features that matter in your home.
3 · Introduce
Make one calm change at a time, observe your pet and adjust the routine as needed.
Place and introduce a cat self-grooming mat safely so rubbing becomes optional enrichment and loose-hair collection. This guide focuses on practical observation, gradual introductions and easy-to-maintain routines, so you can adapt each step to the individual animal rather than follow a rigid formula.
Follow the places your cat already marks
Cats naturally rub cheeks and flanks on corners to leave scent and gather information. Place the mat near a preferred rubbing route rather than in the middle of an unfamiliar room. Start at shoulder height, secure every suction cup and make sure the wall surface is smooth enough to hold. The cat should be able to approach, lean and leave without being cornered.

Introduce scent and texture gradually
Let the cat investigate the clean mat on the floor before mounting it. You can wipe a familiar cloth lightly across the surface or reward calm sniffing nearby. Do not press the cat against it. Some cats use a new texture immediately; others need days. If the bristles seem too firm or the cat avoids the area, remove it and reassess placement.
💡 Practical tip: Place it on an existing rubbing route. Set it near cheek and shoulder height.
Treat it as enrichment, not complete grooming
Self-rubbing can collect loose surface hair and provide a satisfying activity, but it does not reach every coat layer or replace gentle hands-on brushing. Long-haired cats, older cats and animals that struggle to groom may need more help. Regular grooming also lets you notice mats, skin changes, tenderness or parasites that a wall mat cannot reveal.

Clean collected fur and check the mounting
Remove fur frequently, wash or wipe the mat according to instructions and dry it fully. Inspect bristles for damage and suction cups for loss of grip. Reattach only to a clean, dry surface. If the cat develops bald patches, redness, excessive grooming or a sudden change in rubbing behaviour, stop use and ask your vet for advice.
✓ Good to know: Allow voluntary investigation. Continue regular coat and skin checks.
Introduce the change without losing trust
A reliable routine is built through small, observable steps. Begin in the easiest version of the situation, when your pet is rested and the room is quiet. Keep the first attempt short, then repeat it at roughly the same time before increasing difficulty. If the animal can approach, investigate and leave freely, you gain much clearer information than when equipment is placed on them or food is used to push through worry.
Change one variable at a time. That might mean adjusting height before angle, duration before speed, fit before distance, or location before adding another pet. Hold everything else steady for several sessions and note what you see: posture, breathing, pace, appetite, willingness to return and recovery afterwards. A simple record prevents a single unusually good or difficult day from driving the next decision.
Progress is not a straight line. Tiredness, weather, household noise and health can all affect a familiar routine. If your pet hesitates, return to the last comfortable step rather than adding pressure. Stop immediately for pain, panic, breathing difficulty, loss of balance or any sudden physical change. Equipment can support care, but it should never be used to mask a problem that needs veterinary assessment.
A simple seven-day setup plan
- Day 1: inspect the equipment, read the care instructions and let your pet observe it without interaction.
- Days 2–3: reward calm investigation and practise one simple step in a short session.
- Days 4–5: add one practical step: set it near cheek and shoulder height, then finish before attention drops.
- Day 6: use the setup in its real location while closely supervising posture and behaviour.
- Day 7: review cleaning, fit and safety, and decide whether to repeat, progress or step back.
What to record after the first week
Write down three short observations after each session: what your pet chose to do, how the equipment behaved and how quickly normal behaviour returned. Check whether the routine remained easy in real use, whether cleaning and storage fit the household routine, and whether another animal changed the response. Photos or short videos can help you compare posture over time and give a vet, groomer or qualified behaviour professional more useful context if you need advice.
A successful setup should become less dramatic with repetition. Your pet approaches without avoidance, the equipment stays secure, and you can maintain it consistently. If the routine becomes harder, do not assume stubbornness. Recheck fit, location, noise, wear and health before continuing.
Questions to answer before you buy
Confirm the usable dimensions, the animal's current measurements and the exact surface or route where the product will be used. Check how it opens, adjusts, locks and cleans, and decide where it will dry or be stored. If several pets share the home, plan whether they need separate sessions or resources. A feature only has value when it fits the animal and the household routine.
Read the full product page and care instructions rather than relying on a photograph. Compare the stated limits with your own pet, allow for growth or coat changes where relevant, and keep the packaging until the first supervised trials are complete. If the planned use is connected with pain, recovery, anxiety or another medical concern, discuss it with the appropriate veterinary professional before use.
Your quick decision checklist
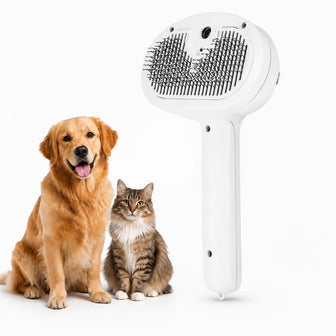
Browse Petifo's cat self-grooming brush collection for equipment that matches the routine described above.
Recommended Petifo products
The products below are selected because their verified specifications support the use cases in this guide. Always confirm dimensions, compatibility and care instructions on the product page.

Frequently asked questions about cat self-grooming brush
1. Will every cat use a massage mat?
No. Texture and location preferences vary, so offer it without pressure and remove it if the cat avoids the area.
2. Where should I mount it?
Choose a smooth surface on a familiar route, with easy access and enough room for the cat to turn away.
3. Can it replace brushing?
No. It may collect loose hair, but hands-on grooming remains important for coat condition and health checks.
4. Should I add catnip?
Only if the product allows it and your cat responds comfortably. Catnip is not necessary for successful use.
5. How often should it be cleaned?
Remove visible hair frequently and clean according to the care instructions before oils and debris build up.
6. When is excessive rubbing a concern?
Skin redness, bald spots, pain or a sudden behaviour change should be discussed with a vet.
Source: PDSA indoor enrichment guidance. General educational guidance only; contact your vet for individual health or behaviour concerns.