






Quick answer: Successful nail care starts before the tool touches a claw. Teach relaxed paw handling, remove tiny amounts, stay well clear of the quick and stop while your pet is still comfortable.
Written by Petifo's Expert Team · Updated August 2026 · Reading time: 5 min
Explore this guide
- Make paw handling the first lesson
- Understand the quick and take less
- Clip for length, grind for the edge
- Keep the tool working properly
- Recommended Petifo products
- Frequently asked questions
Choose your next step
1 · Assess
Check your pet’s measurements, habits and current routine before changing equipment.
2 · Compare
Use the guide’s checkpoints to compare only the features that matter in your home.
3 · Introduce
Make one calm change at a time, observe your pet and adjust the routine as needed.
Build a calm pet nail-care routine with paw handling, safe trimming and gradual grinder training for dogs and cats. This guide focuses on practical observation, gradual introductions and easy-to-maintain routines, so you can adapt each step to the individual animal rather than follow a rigid formula.
Make paw handling the first lesson
For several short sessions, touch one paw, offer a reward and release it. Progress to holding a toe for a second, then showing the tool without switching it on. This preparation is especially important for cats and dogs that dislike restraint. Work on a non-slip surface, keep sessions brief and finish after an easy success. Forcing a frightened pet usually makes the next attempt harder.

Understand the quick and take less
The quick contains nerves and blood vessels. It is often visible through pale claws but much harder to judge in dark claws. Remove a thin sliver at a time and inspect the cut surface after every pass. Stop early if you are uncertain. Overgrown, curled, split or painful nails, and claws growing into a pad, belong with a veterinary professional rather than a home experiment.
💡 Practical tip: Practise calm paw handling first. Use a non-slip, well-lit workspace.
Clip for length, grind for the edge
A clipper removes length efficiently; a grinder can round a freshly cut edge in short, light touches. Introduce the sound and vibration separately before bringing the tool near a paw. Keep fur clear of rotating parts and never hold the grinder on one spot, because friction creates heat. An LED may improve visibility on pale claws, but it cannot make dark quicks reliably visible.

Keep the tool working properly
A worn grinding head takes longer and encourages pressure. Replace it when the surface feels smooth, cutting slows or the finish becomes uneven. Switch the device off before changing parts, confirm the replacement is seated and run it briefly away from the pet. Clean the catcher and cap as directed, charge before the session and store every small part safely.
✓ Good to know: Remove tiny amounts and inspect. Keep fur away from moving parts.
Introduce the change without losing trust
A reliable routine is built through small, observable steps. Begin in the easiest version of the situation, when your pet is rested and the room is quiet. Keep the first attempt short, then repeat it at roughly the same time before increasing difficulty. If the animal can approach, investigate and leave freely, you gain much clearer information than when equipment is placed on them or food is used to push through worry.
Change one variable at a time. That might mean adjusting height before angle, duration before speed, fit before distance, or location before adding another pet. Hold everything else steady for several sessions and note what you see: posture, breathing, pace, appetite, willingness to return and recovery afterwards. A simple record prevents a single unusually good or difficult day from driving the next decision.
Progress is not a straight line. Tiredness, weather, household noise and health can all affect a familiar routine. If your pet hesitates, return to the last comfortable step rather than adding pressure. Stop immediately for pain, panic, breathing difficulty, loss of balance or any sudden physical change. Equipment can support care, but it should never be used to mask a problem that needs veterinary assessment.
A simple seven-day setup plan
- Day 1: inspect the equipment, read the care instructions and let your pet observe it without interaction.
- Days 2–3: reward calm investigation and practise one simple step in a short session.
- Days 4–5: add one practical step: use a non-slip, well-lit workspace, then finish before attention drops.
- Day 6: use the setup in its real location while closely supervising posture and behaviour.
- Day 7: review cleaning, fit and safety, and decide whether to repeat, progress or step back.
Your quick decision checklist
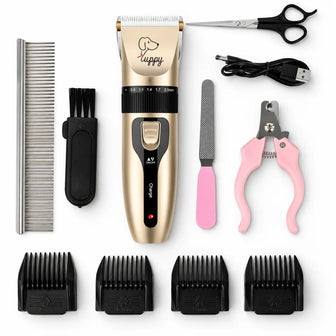
Browse Petifo's pet nail care collection for equipment that matches the routine described above.
Recommended Petifo products
The products below are selected because their verified specifications support the use cases in this guide. Always confirm dimensions, compatibility and care instructions on the product page.


Frequently asked questions about pet nail care
1. How often should pet nails be trimmed?
It varies with species, activity and surface wear. Check regularly and ask your vet or groomer to show you the appropriate length.
2. Can I use human nail clippers?
Use tools designed for the animal. Human clippers can crush or split claws, particularly in cats.
3. What if I cannot see the quick?
Take very small amounts, stop early and ask a professional for help if you are unsure.
4. Is a grinder safer than a clipper?
Each has advantages and risks. A grinder offers gradual shaping but can heat the claw; a clipper is faster but removes more at once.
5. Why does my pet fear the grinder?
Sound, vibration, restraint or a past experience may be involved. Reintroduce it at a distance with rewards and progress slowly.
6. When should a vet handle the nails?
Seek help for pain, bleeding that does not stop, infection, split claws, ingrown nails or a pet that cannot be handled safely.
Source: PDSA claw-clipping guide. General educational guidance only; contact your vet for individual health or behaviour concerns.